Discover the updated Magic Knot method for an even cleaner, stronger yarn join—ideal for seamless crochet and knitting transitions.
Want another foolproof way to join yarn seamlessly? Discover The Magic Knot 2—Invisible Yarn Join, an alternative technique that creates a secure, nearly invisible knot for switching yarn colors or skeins. Perfect for beginners and advanced crafters, this technique is perfect for both beginners and advanced crafters. Don’t forget to check out the full step-by-step crochet tutorial for extra clarity.
What Is The Magic Knot 2?
The Magic Knot 2 is a slightly different variation of the classic Magic Knot. It offers:
- Extra security for delicate or slippery yarns
- A firmer grip for smooth, even joins
- More control over knot placement
It’s ideal for situations where your yarn might otherwise slip or loosen, such as very fine fibers or heavy projects.
Why Use The Magic Knot 2 – Invisible Yarn Join?
Added Security
With its double-wrapped design, this knot holds even the most stubborn yarns firmly in place.
Nearly Invisible Finish
Once incorporated into your stitches, it vanishes almost entirely, leaving your work smooth and professional.
Time-Saving
No tedious weaving in of loose ends. You can continue your project without stopping.
Beginner-Friendly
The steps are simple and easy to learn, even if you’re brand new to yarn crafts.
Grab the Pattern for Visual Learners
If you’re a visual learner, follow along with our pattern tutorial on The Magic Knot 2 | Invisible Yarn Join. We walk you through every step slowly and clearly.
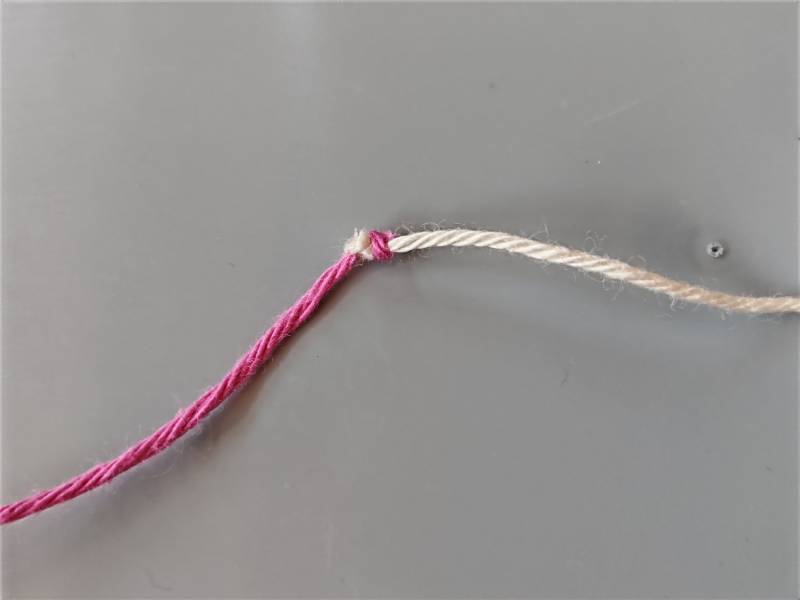
The Magic Knot 2 – Invisible Yarn Join
Where Can You Use The Magic Knot 2?
Color Changes in Crochet & Knitting
Easily switch between colors in striped blankets, garments, or accessories.
Joining New Skeins
Effortlessly add a new skein when your current one runs out without stopping your pattern.
Amigurumi Projects
Create smooth, uninterrupted color shifts for small, stuffed projects.
Delicate Yarns
Excellent for silk, bamboo, and other fine fibers where the original Magic Knot might slip.
Large Projects
Perfect for blankets, scarves, and sweaters where secure joins are essential.
Pro Tips for The Magic Knot 2
Practice First
Before starting a big project, practice with scrap yarn to build confidence.
Use Consistent Tension
Pull both knots tightly but evenly for the strongest hold.
Avoid Over-Trimming
Leave a tiny bit of tail (about 1/8 inch) to prevent the knot from slipping over time.
Blend Knot Placement
Position your knot where it will naturally blend into the stitch pattern.
FAQs for Beginners
Is this better than the regular Magic Knot?
Both are great. This version provides extra grip for slippery yarns or heavy projects.
Can I use The Magic Knot 2 for any type of yarn?
Yes, but it’s especially recommended for fine, smooth, or slippery yarns.
Will the knot show in my final work?
No — once crocheted or knitted over, it virtually disappears.
Final Thoughts
The Magic Knot 2 – Invisible Yarn Join offers a simple, efficient way to connect yarns seamlessly, no matter your project type. With practice, this technique becomes second nature and keeps your projects tidy, secure, and frustration.