Learn how to make a slip knot for crochet
Learning how to make a slip knot for crochet is the very first step in starting any crochet project. This simple loop forms the foundation of your journey with yarn and hook, and although it might look like a small detail, the slip knot is the gateway to all stitches, patterns, and creativity that will follow.
Whether you are an absolute beginner or brushing up your skills after some time away, this step-by-step guide will walk you through the process of making a perfect slip knot, explain its importance, show common mistakes, and give ideas on how to practice and apply it in real projects. The tutorial is accompanied by detailed images and a video demonstration to help you learn faster and more confidently.
What Is a Slip Knot in Crochet?
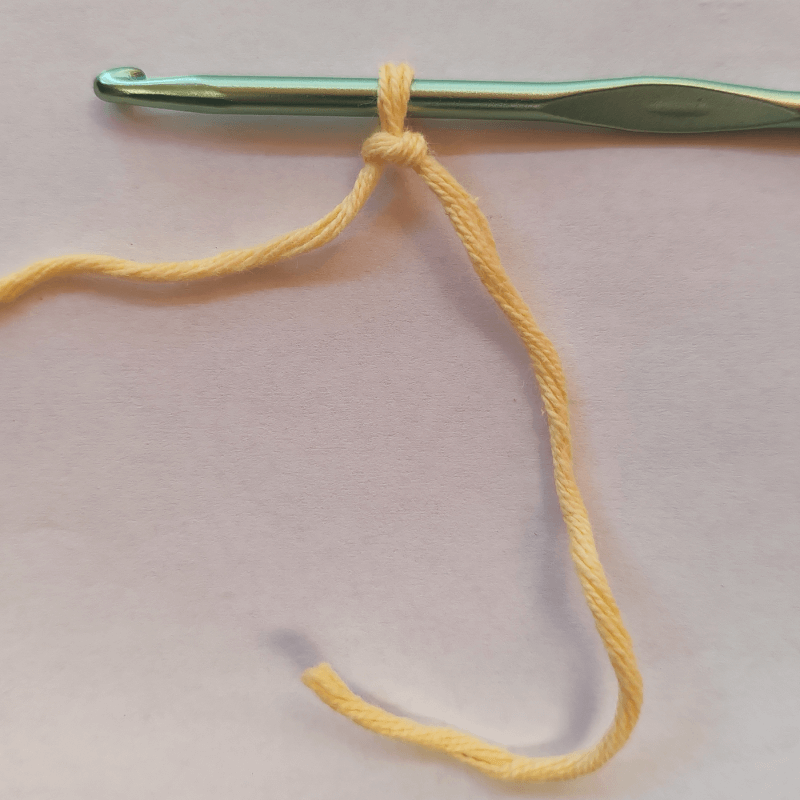
A slip knot is a simple, adjustable loop made with yarn that goes onto your crochet hook and marks the beginning of your foundation chain. It’s flexible, secure, and easy to tighten or loosen as needed. It doesn’t count as a stitch but acts as the base for your first chain stitch and everything that follows.
The slip knot is called “slip” because it can easily be tightened or undone by pulling one end. That’s what makes it perfect for crochet — you can control the size of the loop and adjust it to your crochet hook for a snug, comfortable start.
Why Is the Slip Knot So Important for Beginners?
For crochet beginners, mastering the slip knot is essential because it’s the first thing you do before chaining. If your slip knot is too tight or loose, your chain might become uneven or difficult to work with. A good slip knot will give you better control over tension and create a smooth transition into the foundation chain.
Practicing the slip knot early helps you get used to holding the yarn, using your fingers to guide it, and understanding how the hook interacts with the loop. These are all essential coordination skills that will help you later with more advanced stitches.
Common Mistakes to Avoid
Even though it seems simple, beginners often make small mistakes with the slip knot. Here are some tips to avoid frustration:
- Making the loop too tight: This makes it difficult to move your hook or form a proper chain.
- Twisting the loop: The yarn should lie flat. A twisted loop can lead to uneven chains.
- Using the tail instead of the working yarn: Always pull with the yarn attached to the ball to keep the loop adjustable.
- Not securing the knot: Pull gently on both yarn ends to ensure your knot is solid but not stiff.
How to Practice the Slip Knot
If you’re just starting, practice making the slip knot repeatedly until you can do it without thinking. Try it with different yarn types and hook sizes. Some yarns are slipperier than others, so this will help you understand tension and grip.
To improve muscle memory:
- Practice 10–15 slip knots in a row.
- Undo and redo them multiple times.
- Switch hands occasionally to improve coordination.
Over time, you’ll be able to make a slip knot in just a few seconds.
What’s Next After the Slip Knot?
Once you’ve mastered the slip knot, your next step is learning how to make the foundation chain. This is the first row of your crochet work, and every other stitch will build on it. The chain stitch (ch) starts from the slip knot and grows with each yarn-over and pull-through.
To learn how to make a foundation chain, read the full beginner tutorial on our blog or watch the detailed video demonstration.
Ideas for Projects Starting with a Slip Knot
Here are a few simple projects that begin with a slip knot and help you practice chaining and basic stitches:
- Simple bookmarks
- Crochet chains for garlands
- Small coasters or dishcloths
- Amigurumi heads or bodies
- Hair ties and scrunchies
- Basic scarves or headbands
Each one of these projects begins with the humble slip knot and grows into something functional and beautiful. It’s a perfect reminder that even the most advanced pieces begin with a single loop.
Final Thoughts: Mastering the First Step in Crochet
The slip knot might seem like a minor technique, but it is the gateway to every crochet creation. It teaches you how to handle yarn, manage tension, and start with confidence. Whether you plan to crochet cozy blankets, colorful amigurumi, or stylish accessories, your journey begins with this simple, beautiful loop.
If you haven’t already, make sure to practice the slip knot and watch our YouTube tutorial for extra guidance.
Happy crochet!
3 Ways to Make a Slip Knot – Grab Pattern!
Learn 3 Different Ways to Make the Perfect Slip Knot with Our Pattern
This pattern shows 3 easy ways to make a slip knot for crochet beginners. This will help you choose the method that works best for your hands and yarn tension. How to Make a Slip Knot for Crochet – Easy Beginner Tutorial look video!